I like to grow mushrooms. Once I started, I got into making my own spawn, then
culturing the mycelium to make the spawn.
First thing you learn when you start any type of microbiology is that
contaminants are everywhere. Doubly so for fungi, of which mushrooms are a
subset. Opening a Petri dish with a fungal friendly media for just a second,
to household air will often contaminate the plate with something unpleasant.
There are two good solutions to this. A laminar flow
hood, and a glovebox.
The latter being easier to build, by a long shot. A glovebox is used for
bacteriology, air sensitive chemistry, or dealing with extremely dangerous
materials. The latter is not the subject of this 'how to'.
While I've made a Laminar flow hood, a glovebox has it's own advantages and
disadvantages. The ease of construction made me want to try.
Procedure
Before getting into the process full steam, what follows is the intended
process, containing only some of the mistakes and rework that happened,
frequently as I went through this. I'll include a section on some of the
many pitfalls I encountered.
-
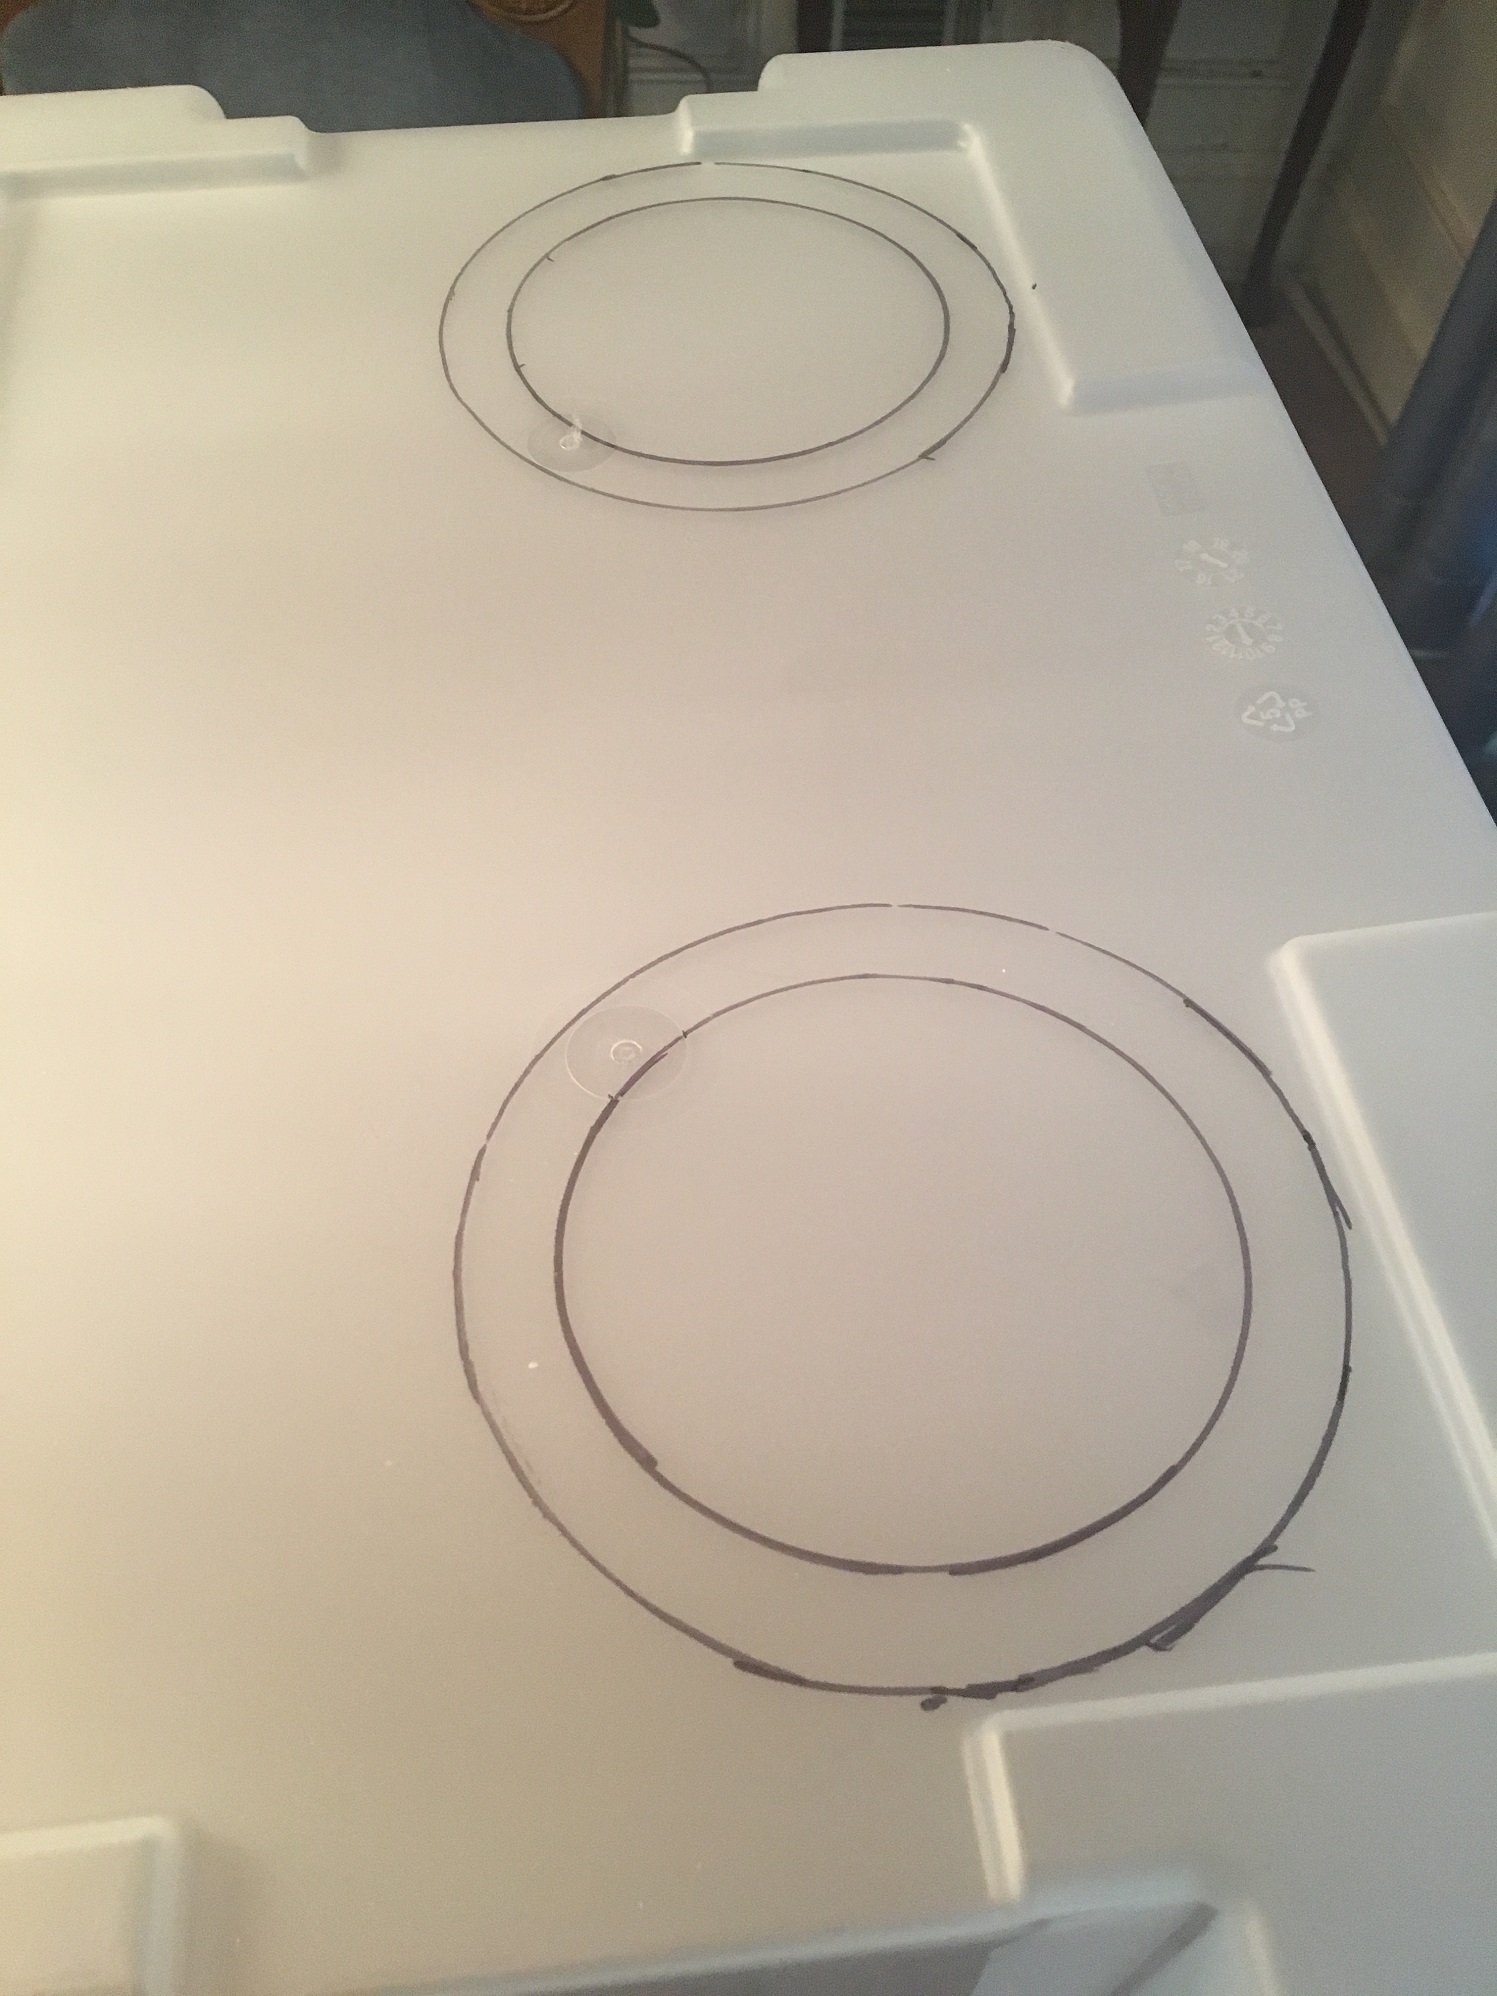
First you mark the holes where you think it will be comfortable to reach into
the box. My choice was too low for the box and the glove sizes. I feel almost
as if I am barely looking over the box when my hands are fully in the gloves.
-
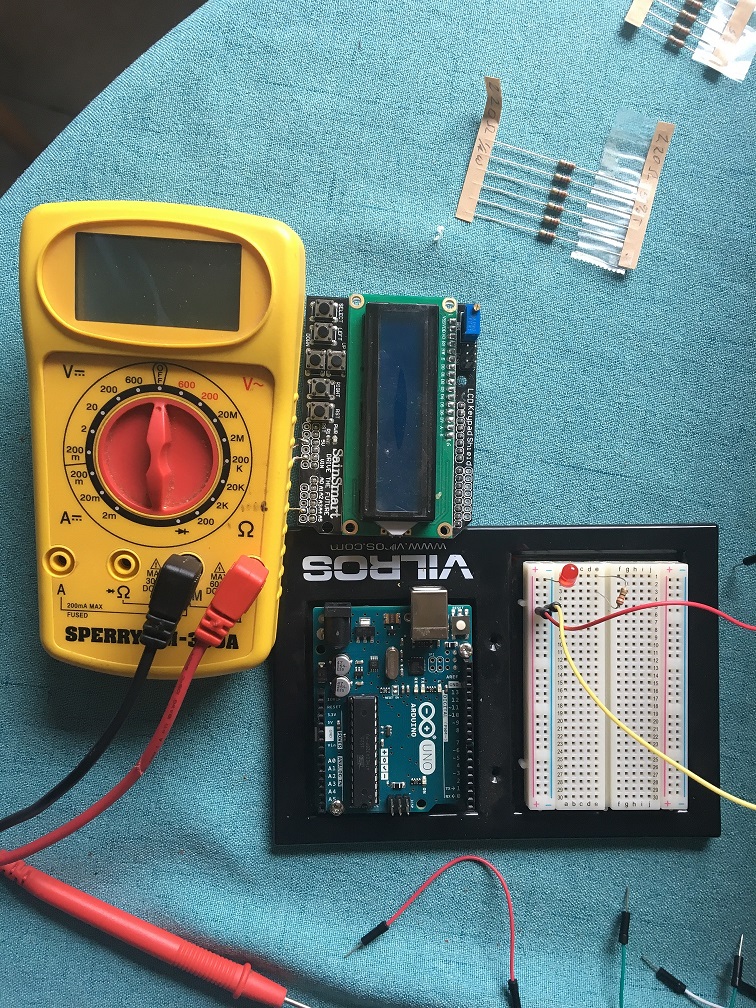
The second step involves cutting the holes, by far the hardest and
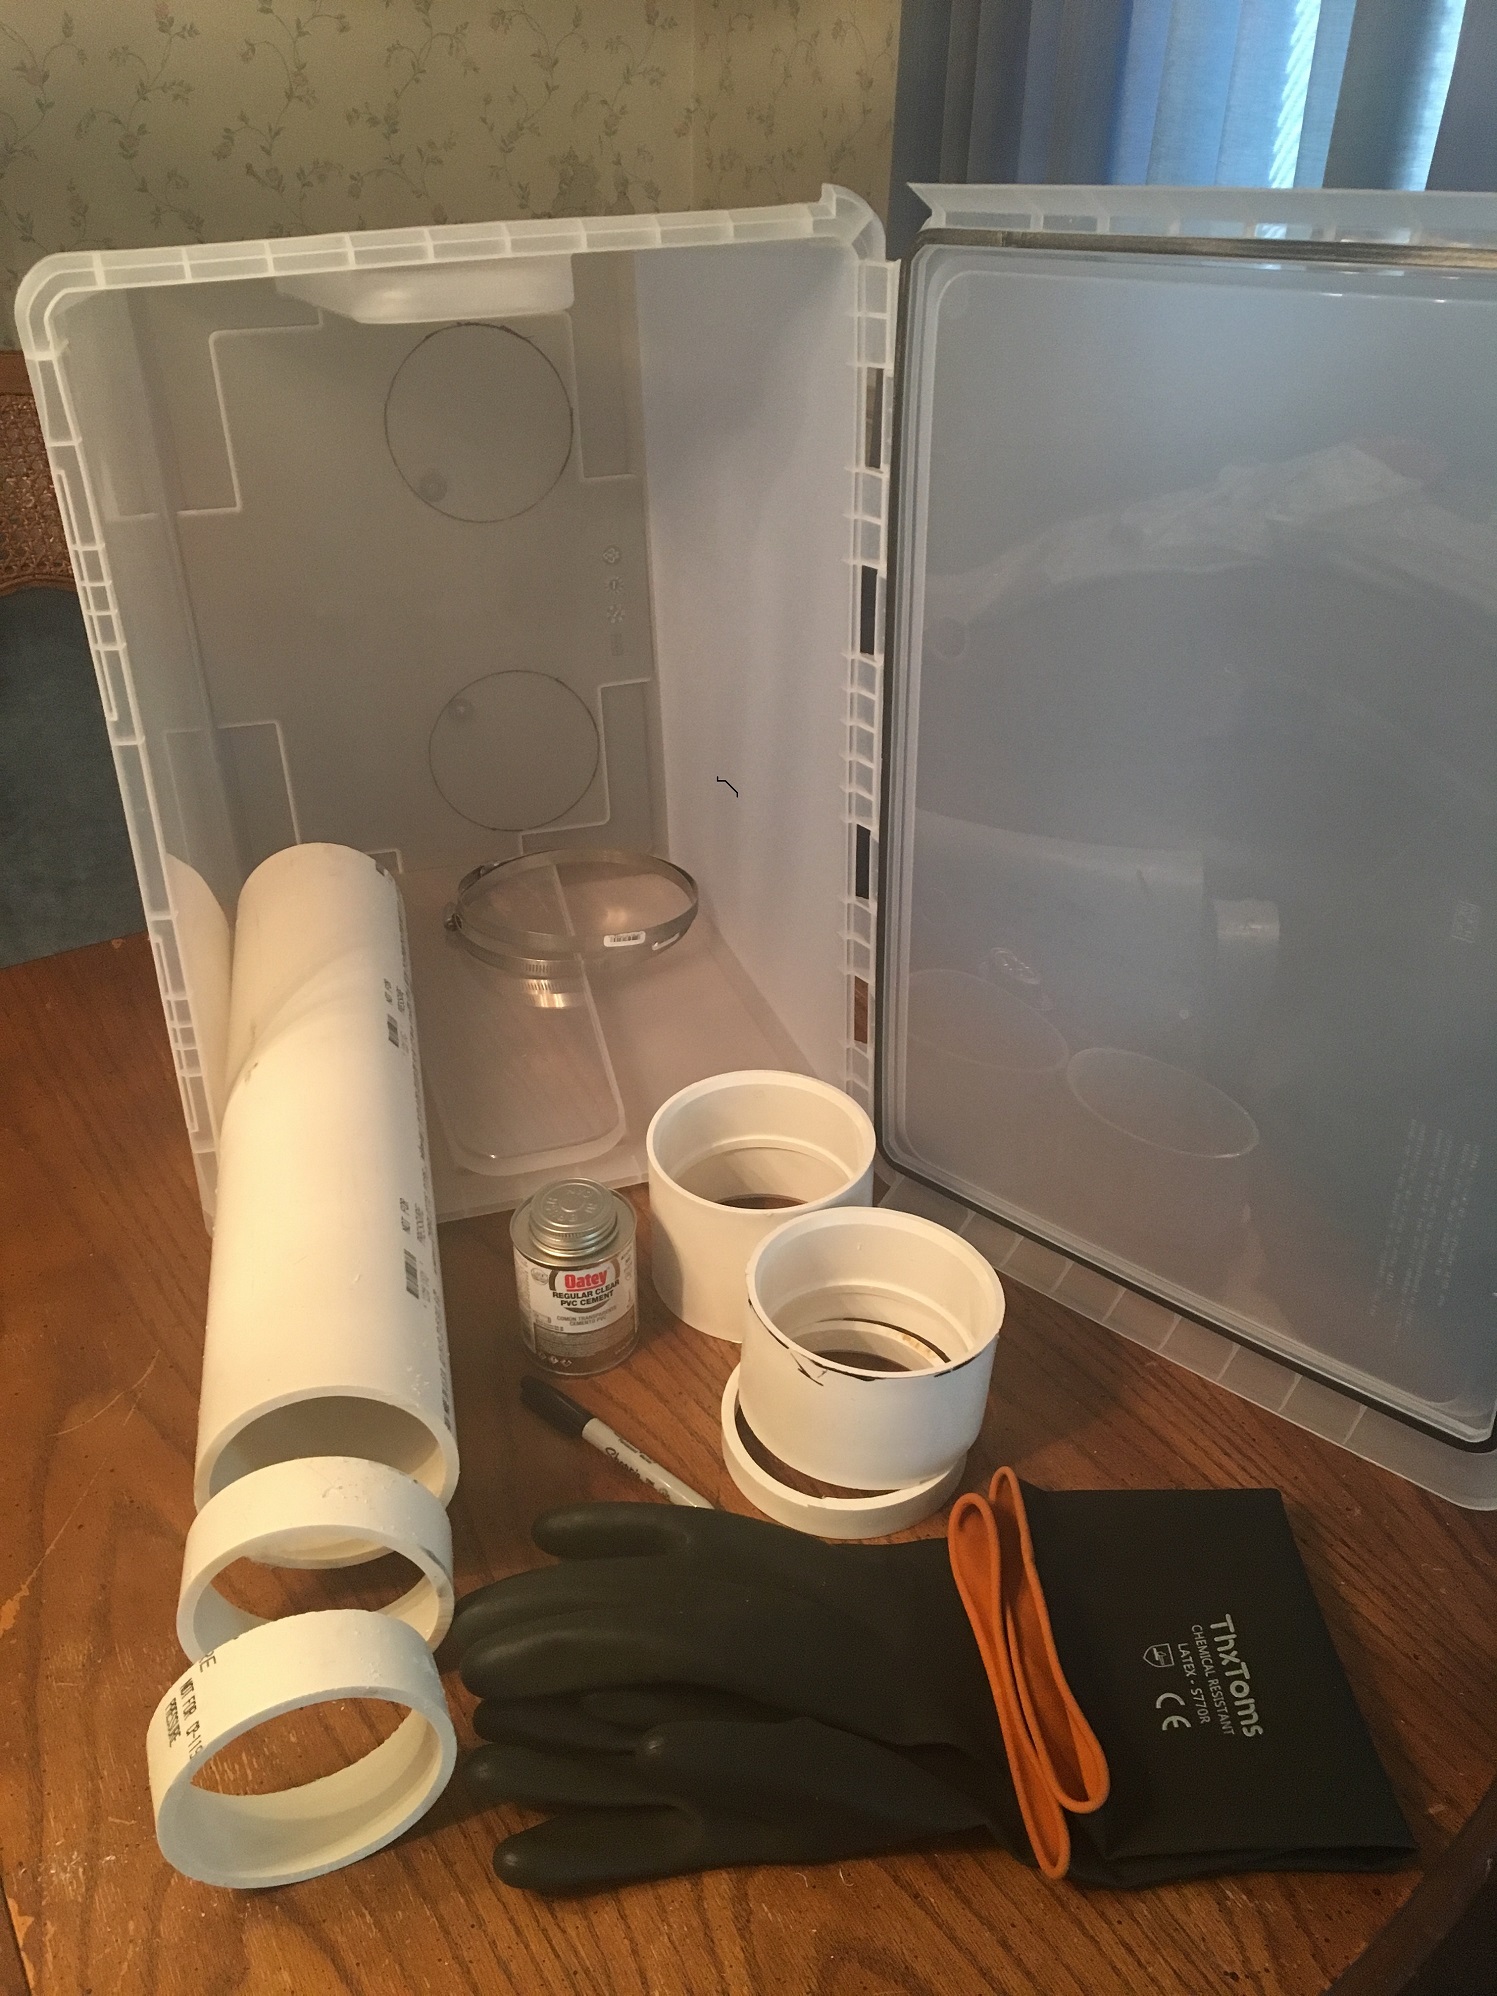
riskiest part of making a glovebox. I used a rotary (dremel) tool and a wood burr bit. The specific bits for this
can be found in the top upper left and lower middle of this picture.
It required a number of passes and then a final pass using a box cutter. Use
great care with the box cutter. If you try to saw with it, you will likely
fracture the plastic. I did. I ended up raising the hole outline to cover the
break. I was lucky the break occurred early.
I suspect there are other ways to make the holes, but I would avoid saws,
unless you have wood attached to both sides of the plastic.
-
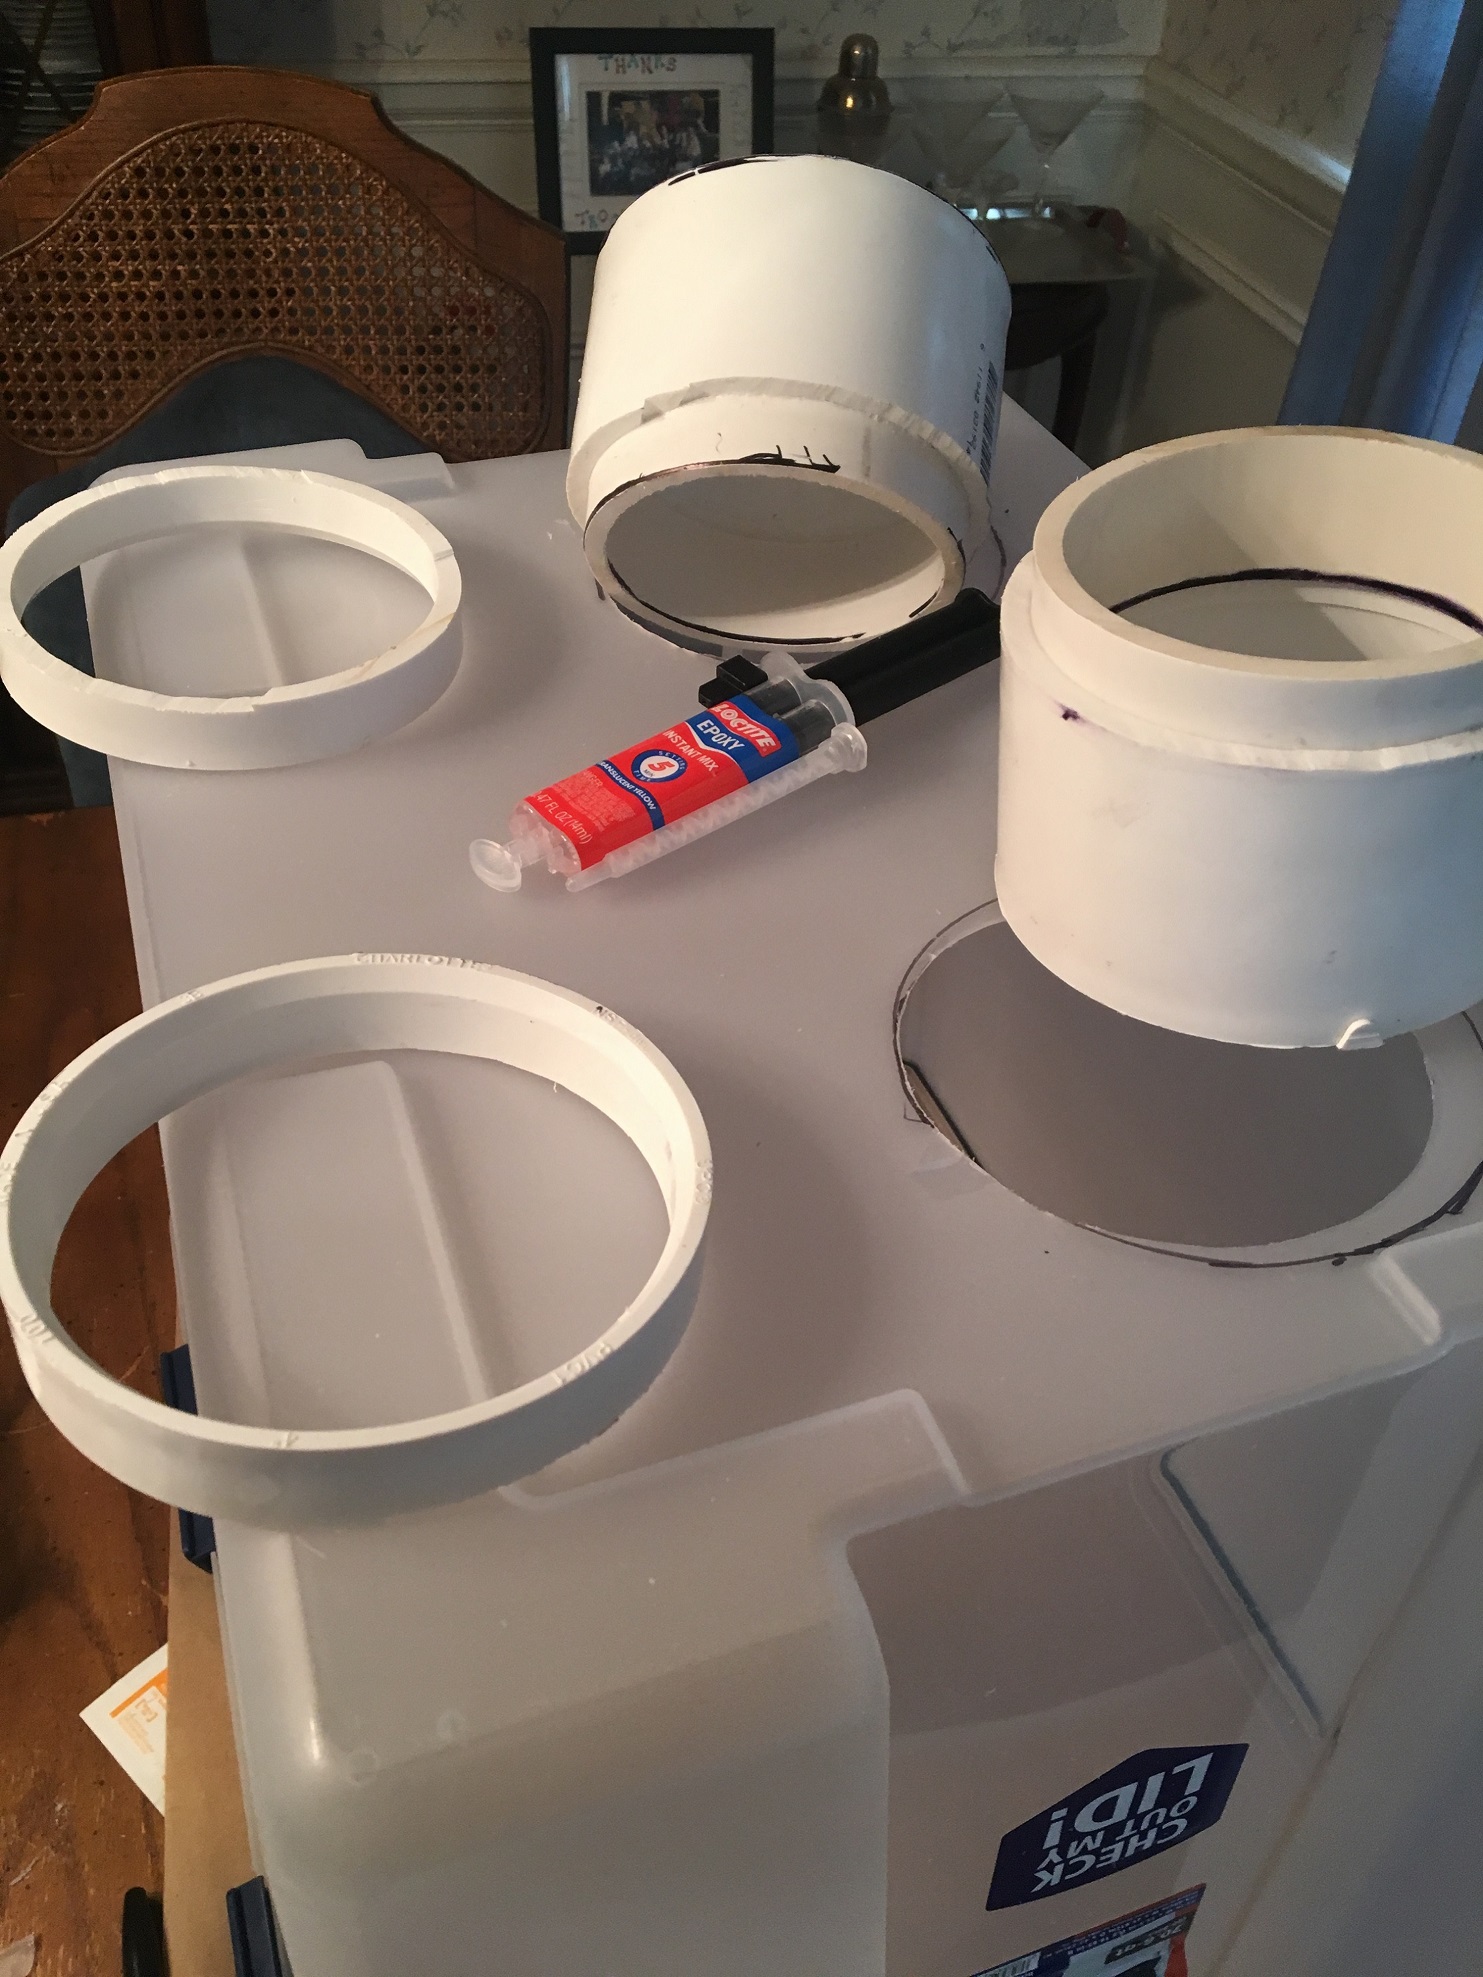
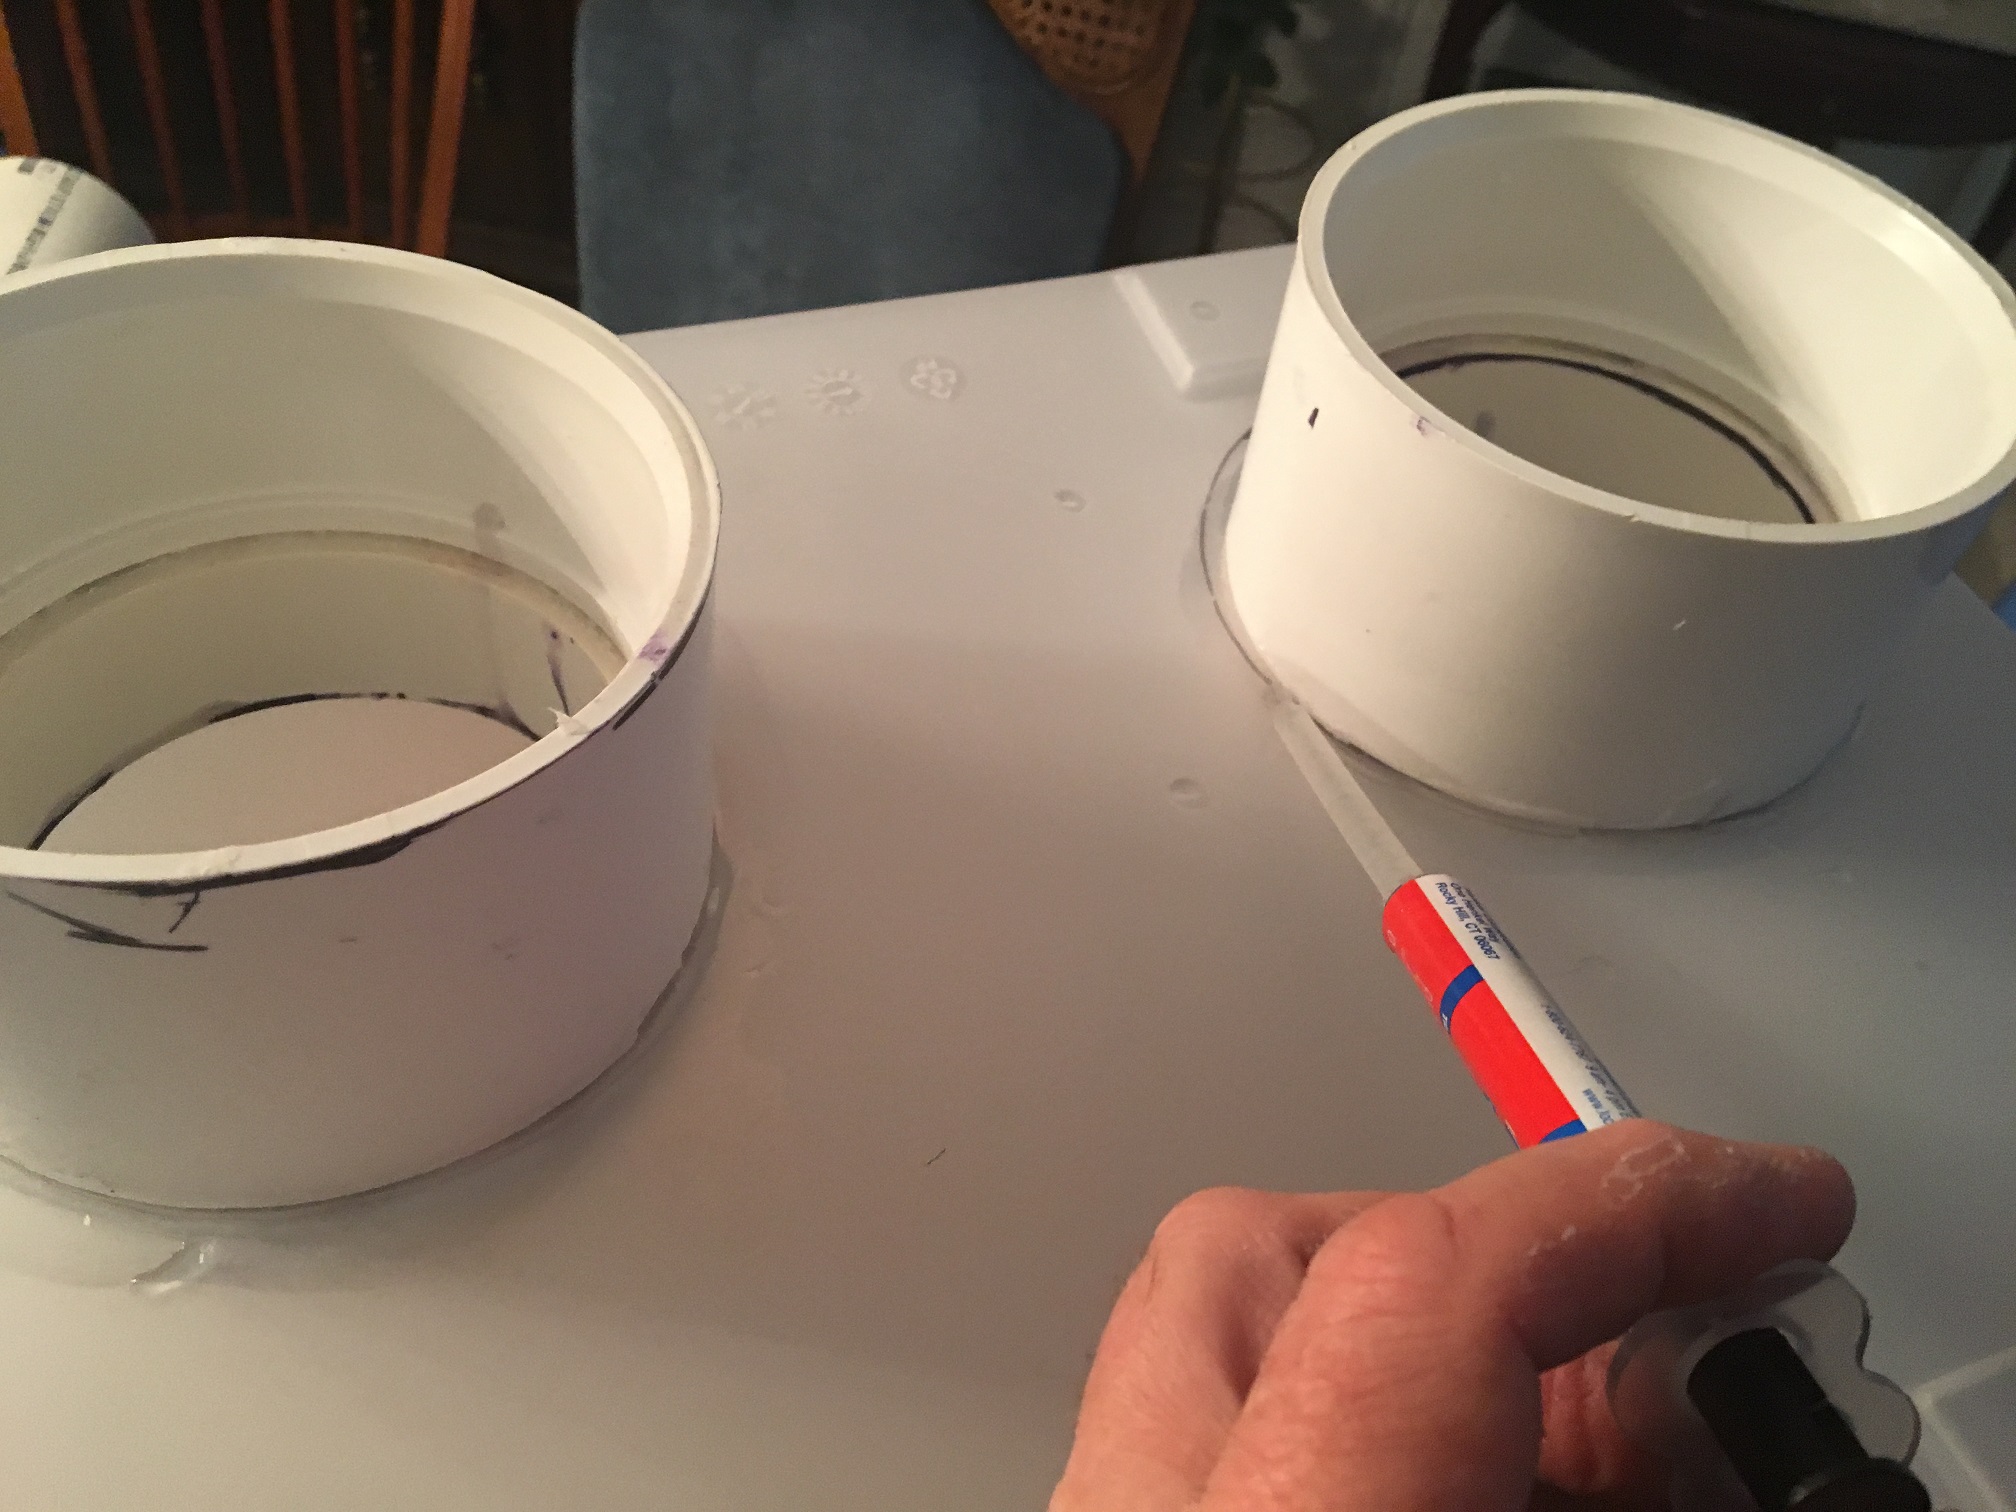
Make your cuts to the PVC couplings. I cut them about an 3/4 of an inch in from one
side - trying to make the places where the PVC tube inserted into it the same
on each side of the cut. The parts picture,
above,
will help in clarifying where the
cuts should be made to the couplings. The picture to the right may also help,
though it shows the PVC tube portion already cemented into the coupling.
I used a table saw, but a hack saw will work if you
are seriously masochistic. You will need to reduce the sharp edge of
each side of the cut. Sharp edges make insertion more difficult.
-
Cut a small section of pipe, about the length of the uncut side of
the coupling PVC joint. Again clearing the cut edges so they aren't sharp,
enabling easier insertion.
-
For the cementing/gluing steps, get disposible surgical gloves and a large sheet of newspaper or some
other low value covering to protect working surfaces and hands.
Completely understand everything to be done in the next steps, prior
to starting. They cannot be done slowly and mistakes ruin your parts.
-
Before applying cement, ensure all surfaces are clean and you can fit them
together. Read the PVC cement directions. When both couplings have the one
of the joints sliced. Liberally coat the cut side of bigger section of the
coupling joint with PVC cement as well as the part
of the PVC pipe fitting into it, then insert. A quarter turn is
recommended, but you won't be able to with such a large diameter pipe. A half
inch turn will be good. If you
cannot turn it, hold it in place until it sets a little or it will come right
back out. Do this with all joints. Clean excess cement from around join, both
inside and out.
-
Prepare the epoxy glue applicator by snapping off the seal and attaching the long 'mixing'
application probe.
-
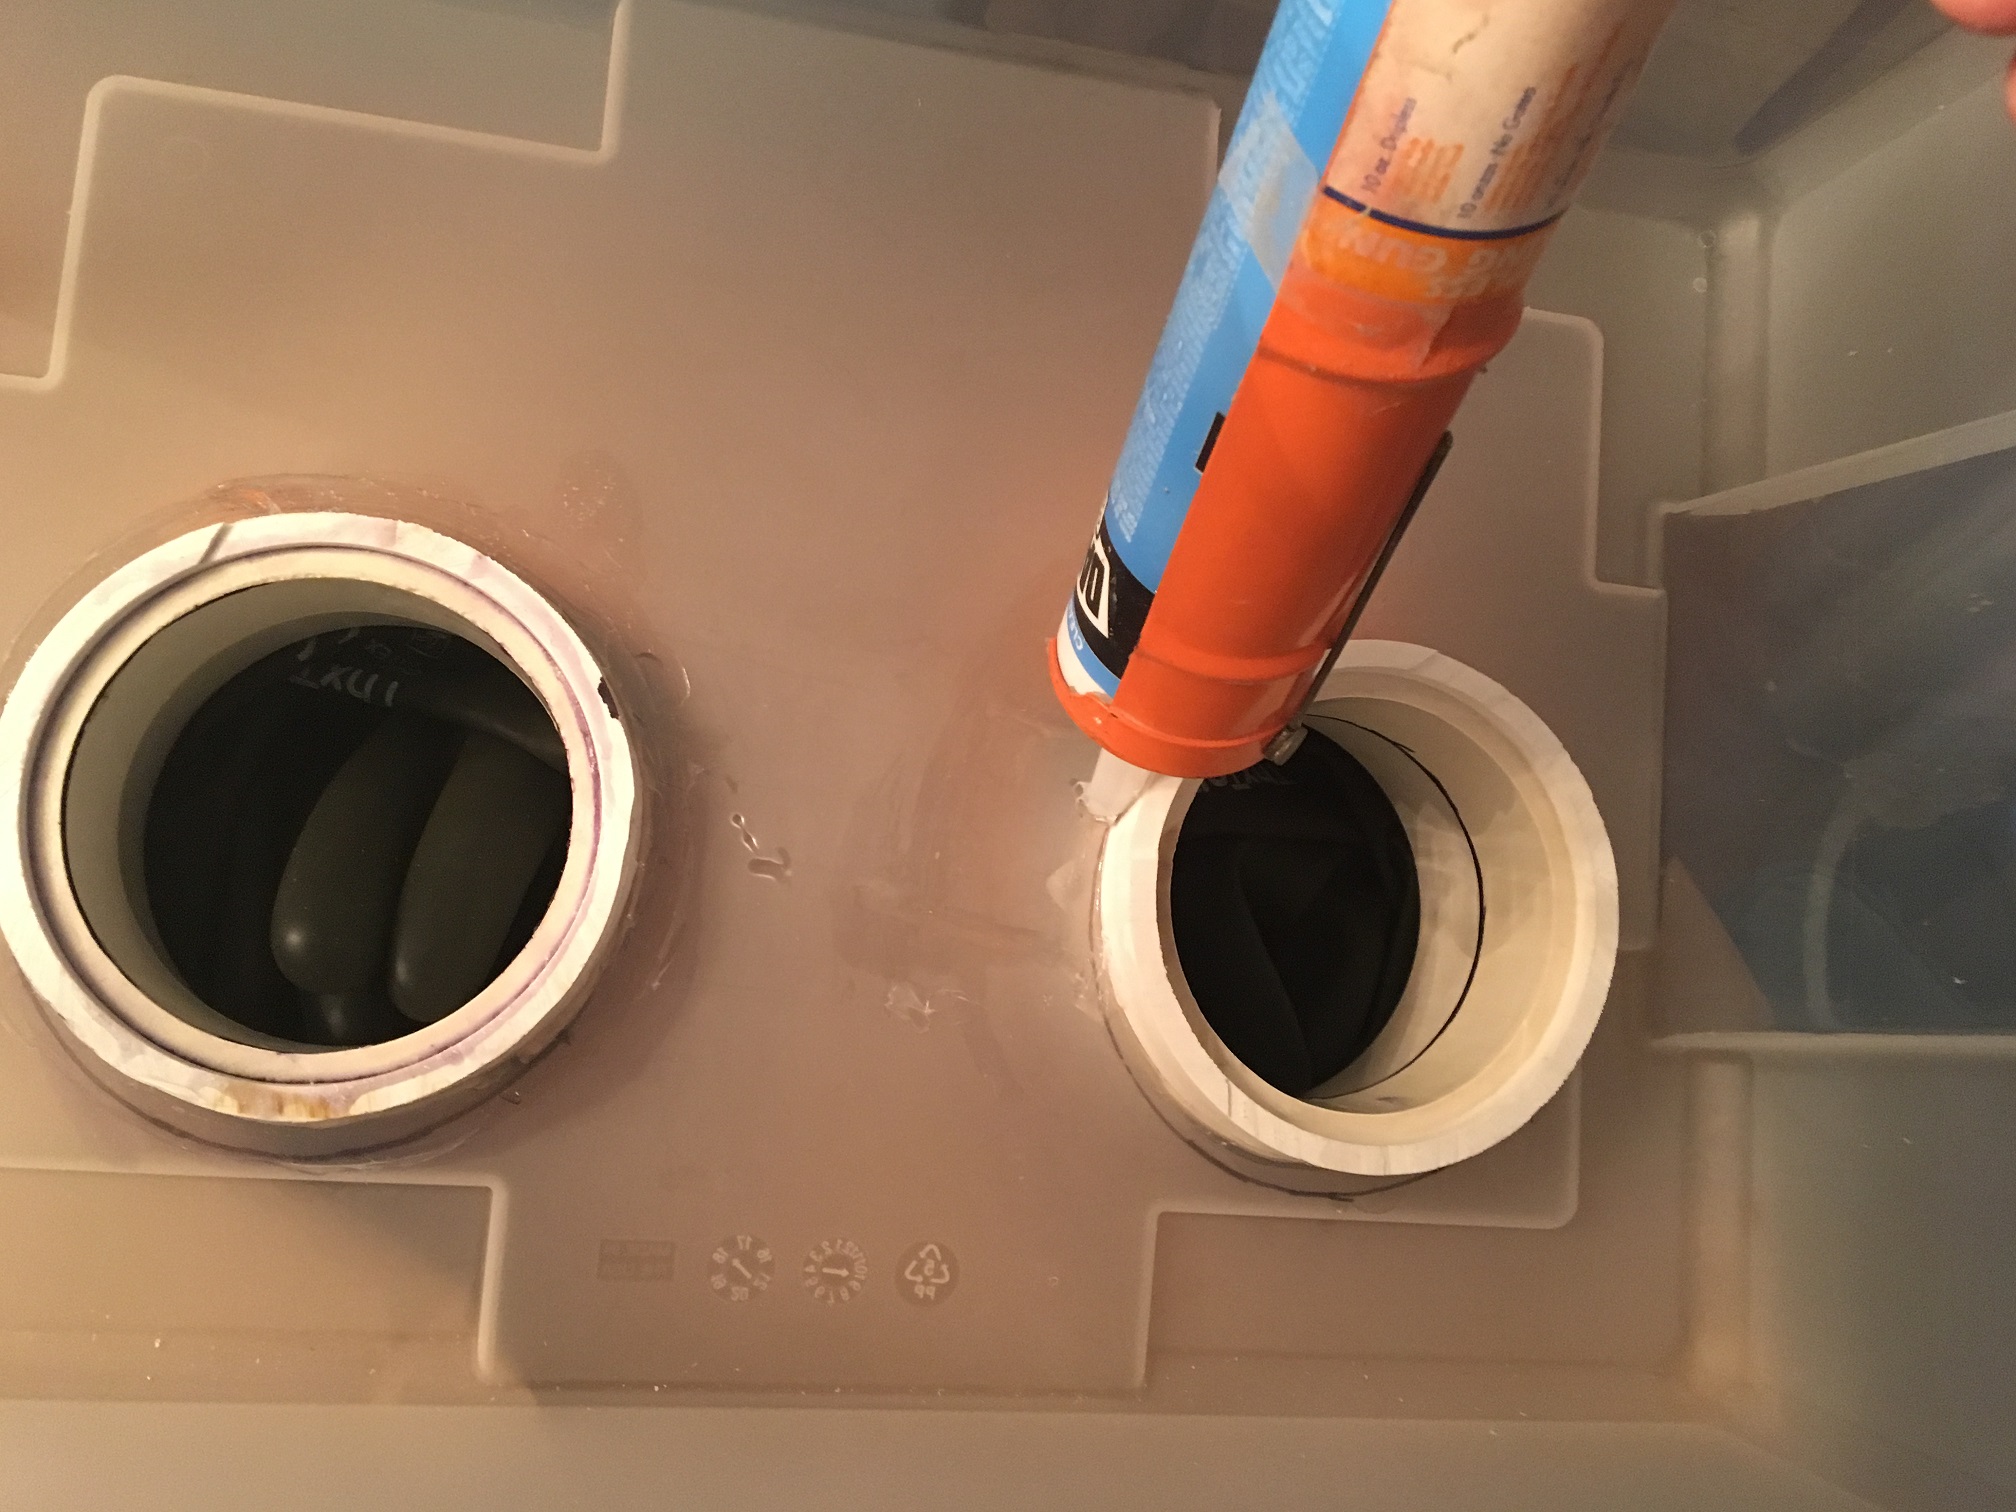
The next few steps cannot be done slowly. The epoxy will set in 5 minutes, so
care and speed are essential. Apply epoxy to the exterior surface of the box,
just around the hole but not quite touching it.
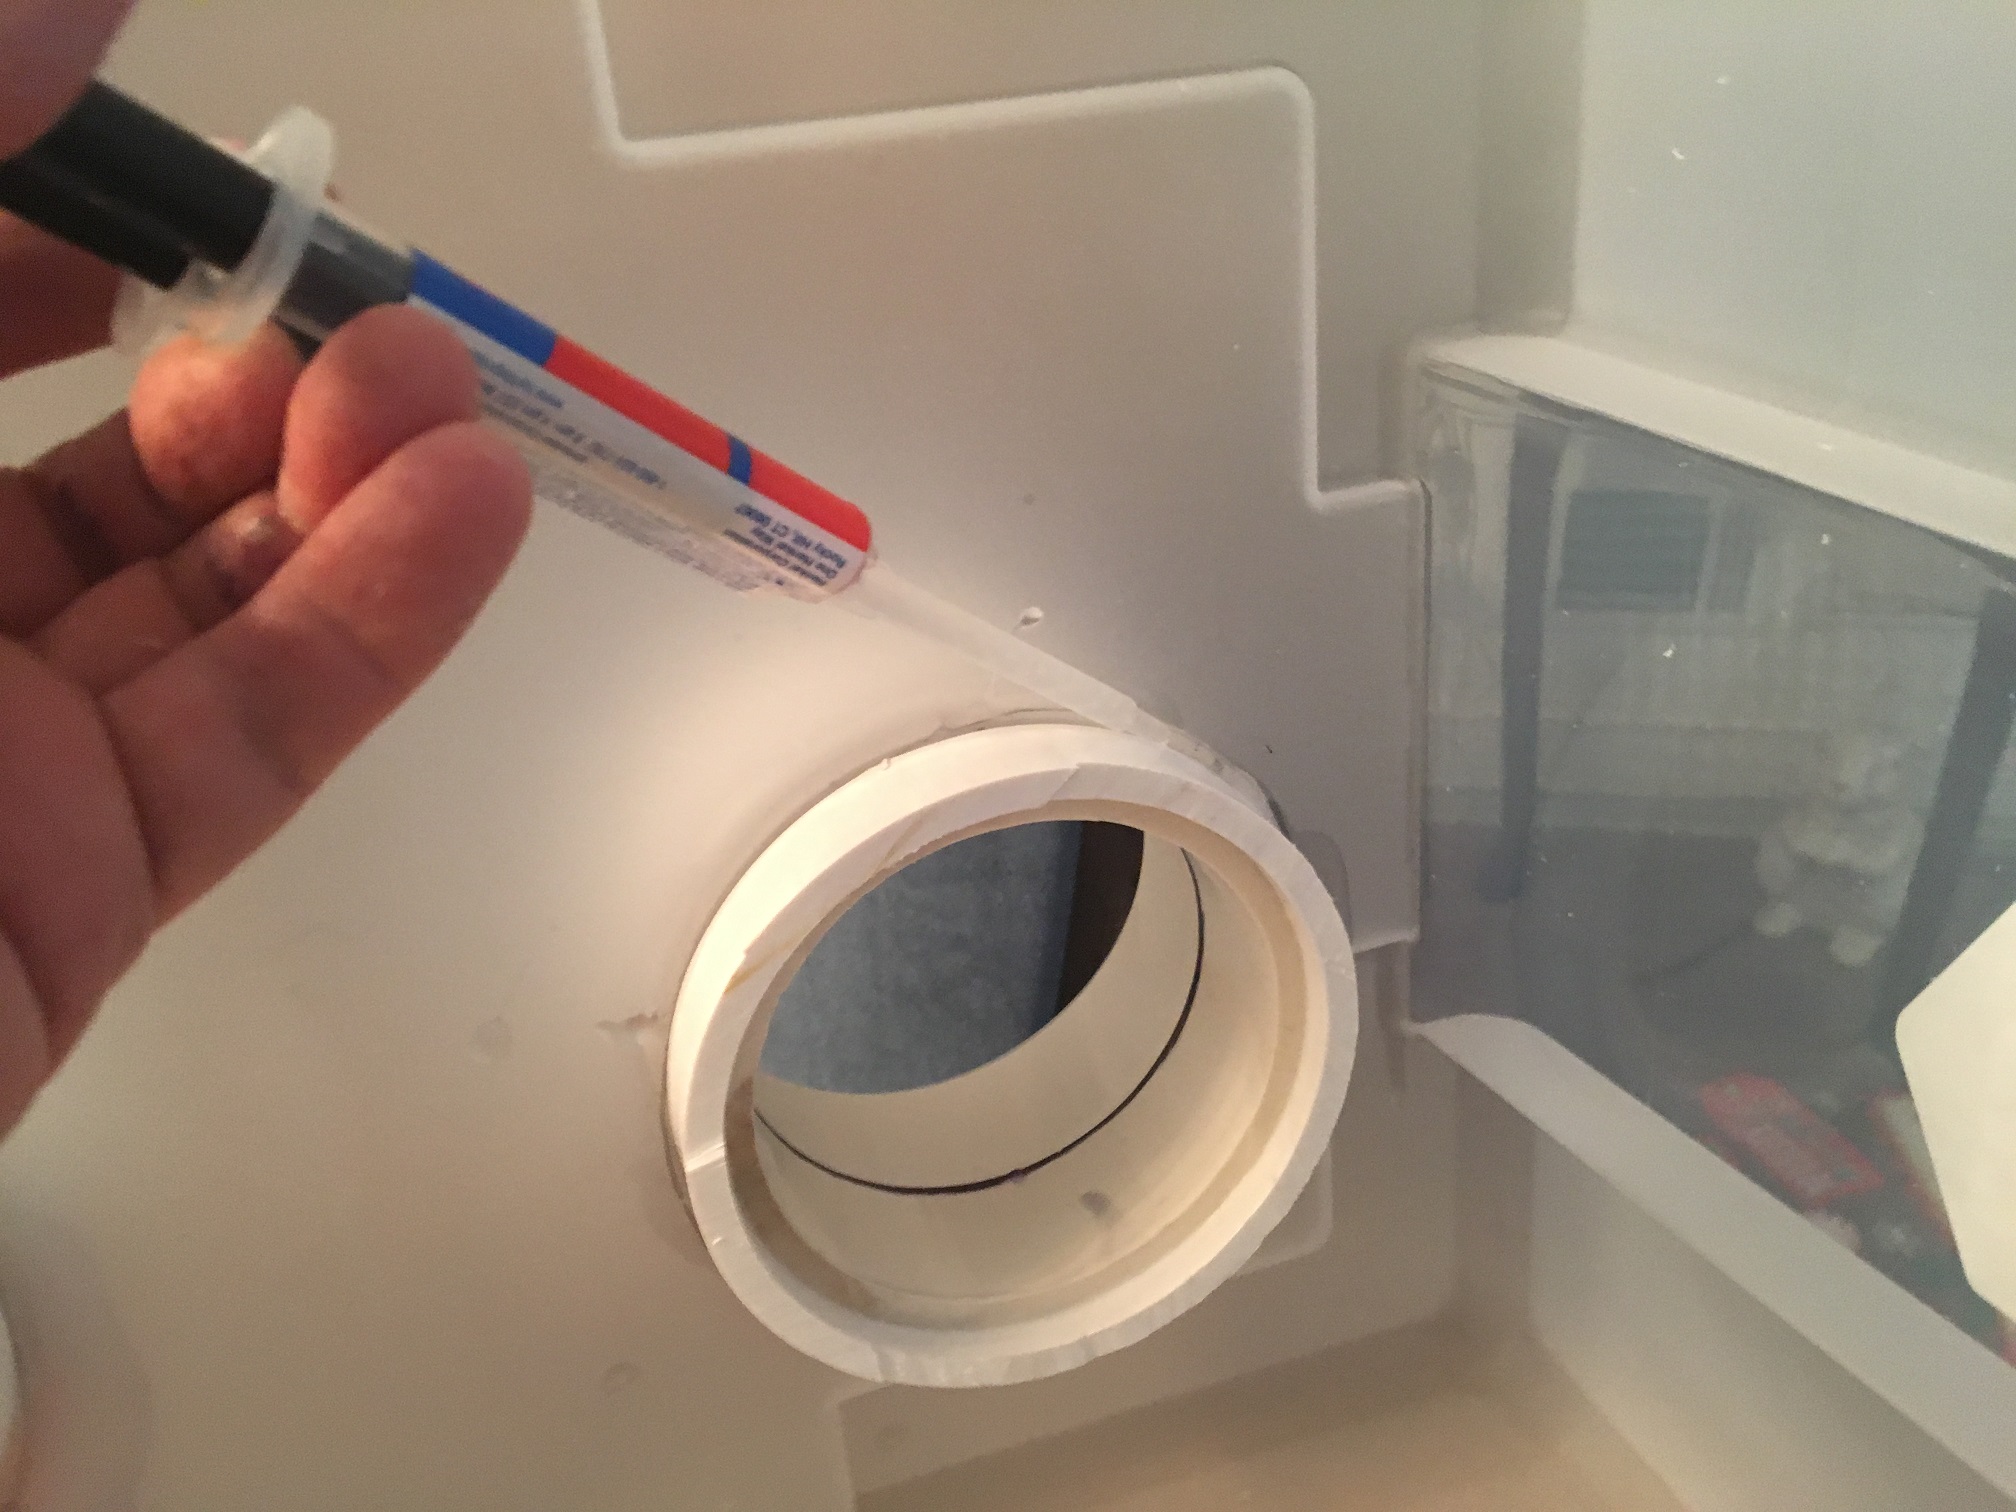
-
The coupling/pipe combination should be inserted from the outside of the
box, through the holes. I then invert the box so the box rests on the
coupling/pipe with the short pipe portion extending through the hole into the
bottom of the box. Liberally apply PVC cement to the inner surface of the small
cut off section of the coupling - the 'ring' portion. Liberally apply PVC
cement to the pipe portion extending into the box, through the hole,
specifically to the outer surfaces. As soon as everything has cement applied,
slide the ring, bevel edge toward the pipe, over the pipe and down as far on as
possible. Using the beveled end makes it much easier and speed is essential.
Either twist slightly, or hold in place until it will stay without holding.
-
Apply epoxy around the the joint you just made, where the PVC meets the
interior surface of the box. By this time, you should have, or come close to,
using all the epoxy in the applicator. Clean off any excess PVC cement, inside
and out.
-
Clean any excess epoxy or PVC cement that's gotten onto the plastic of the box
or onto areas you don't want it. Wait a minimum of 5 minutes for the epoxy to set and the
PVC cement to set up. Fifteen minutes is better.
-
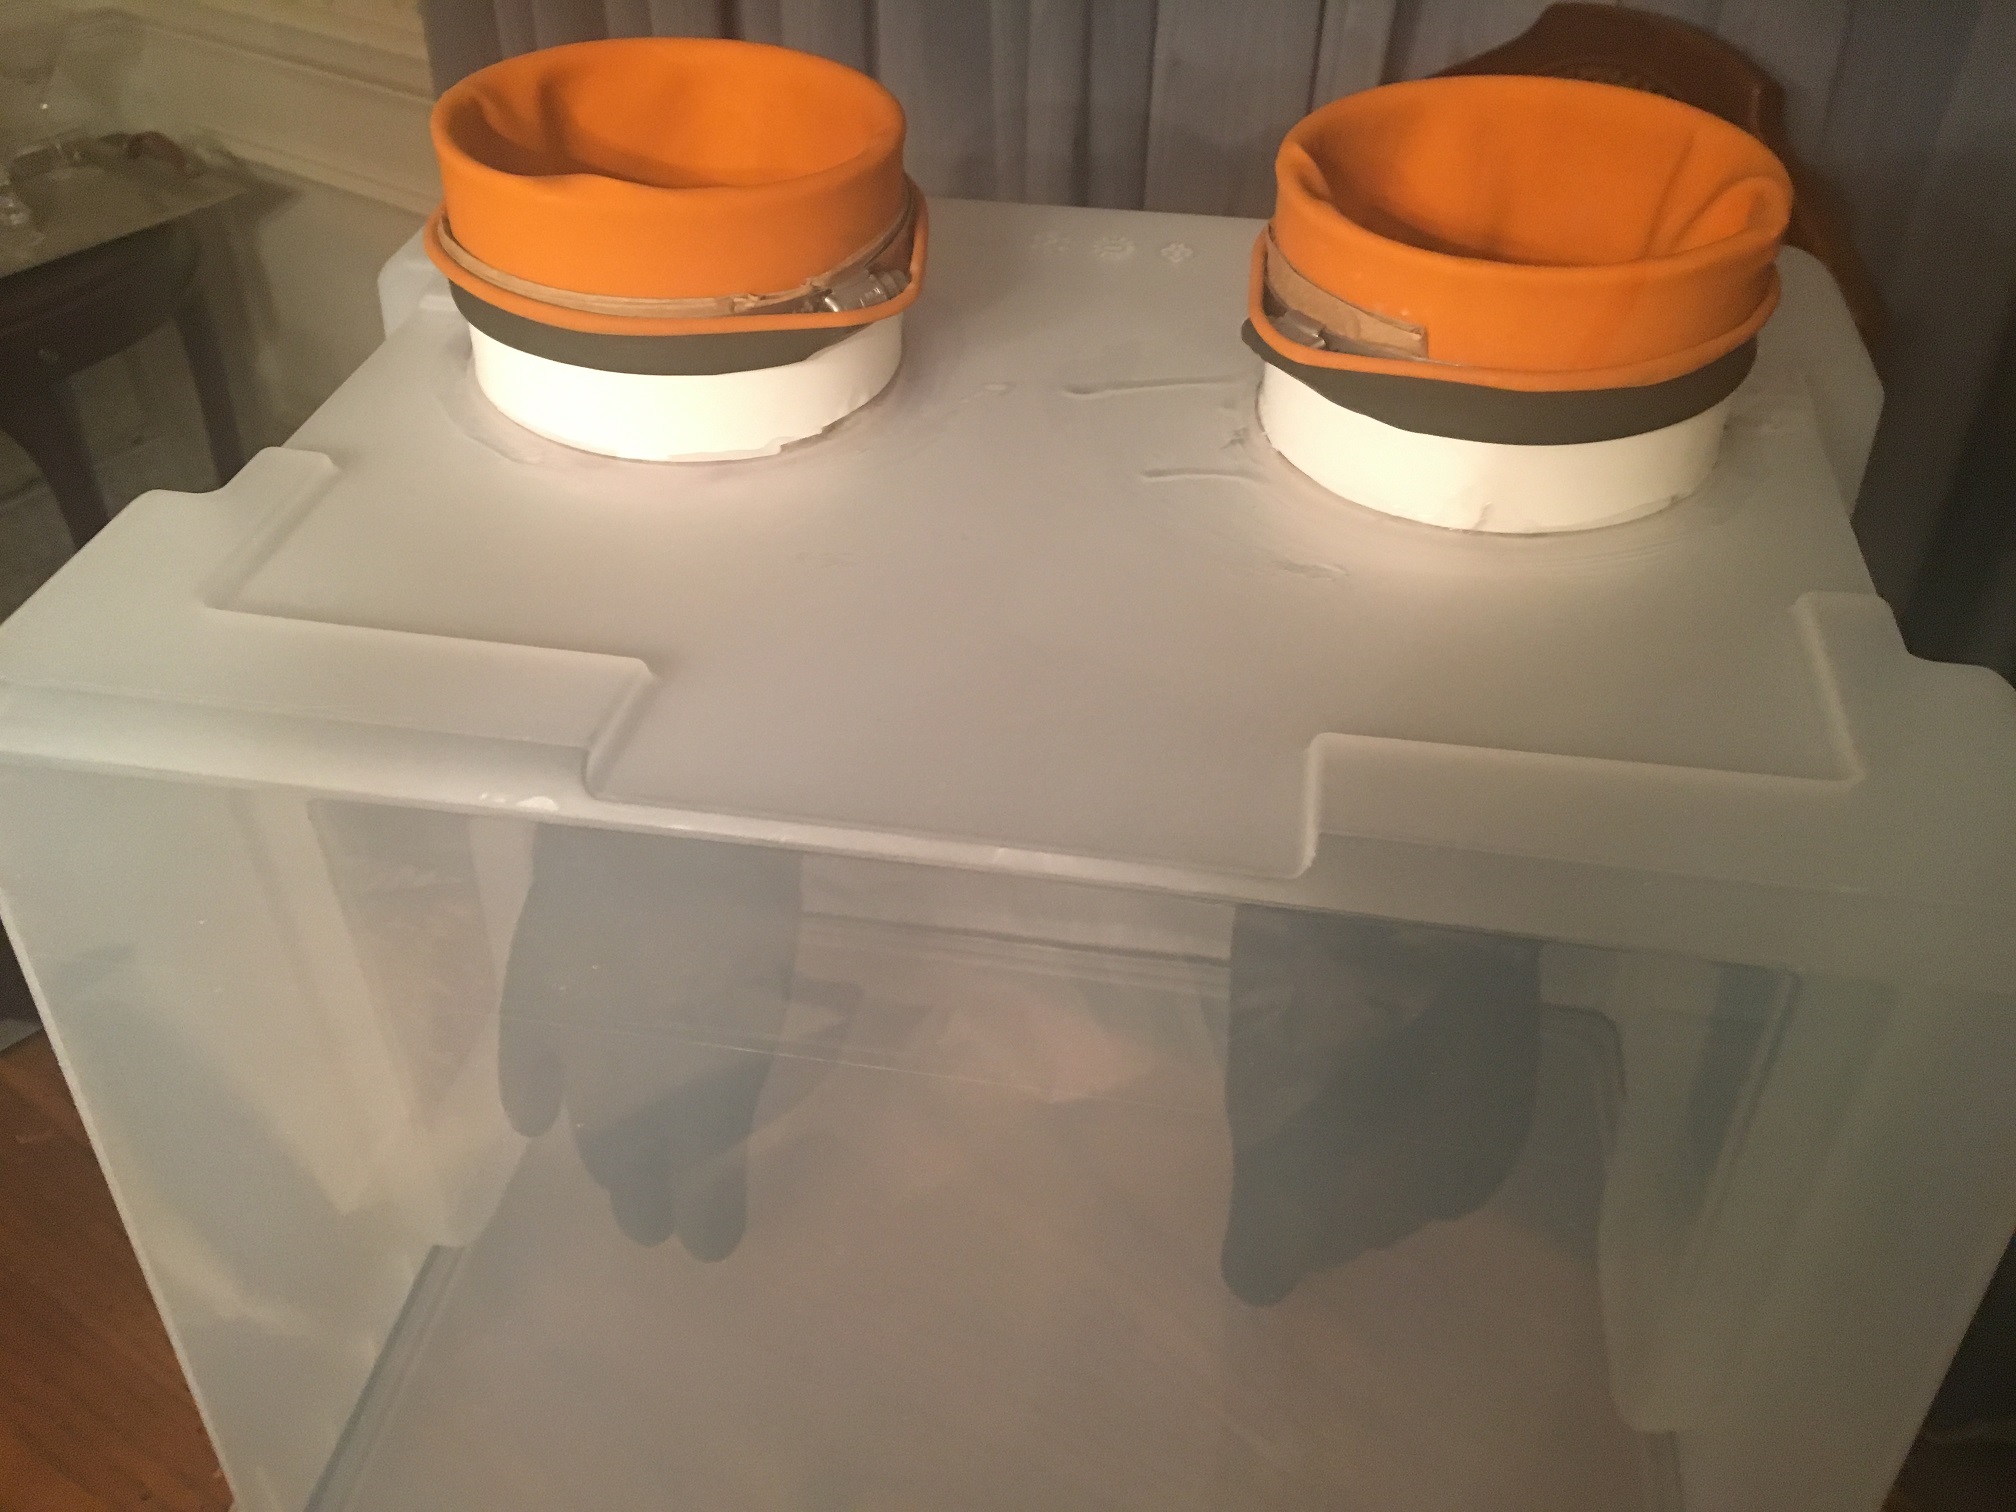
After all the cements/glues have set, application of a silicone caulk or sealent
is a good idea. It will ensure no leakage of contaminating air into the glovebox.
From the picture, you can tell this was an afterthought for me. I had already
attached the gloves. Clean off excess caulk.
- After the silicone caulk has dried and PVC cement has been removed from any exposed
surface, as well as and the interior of the coupling "ports" you've just created, you
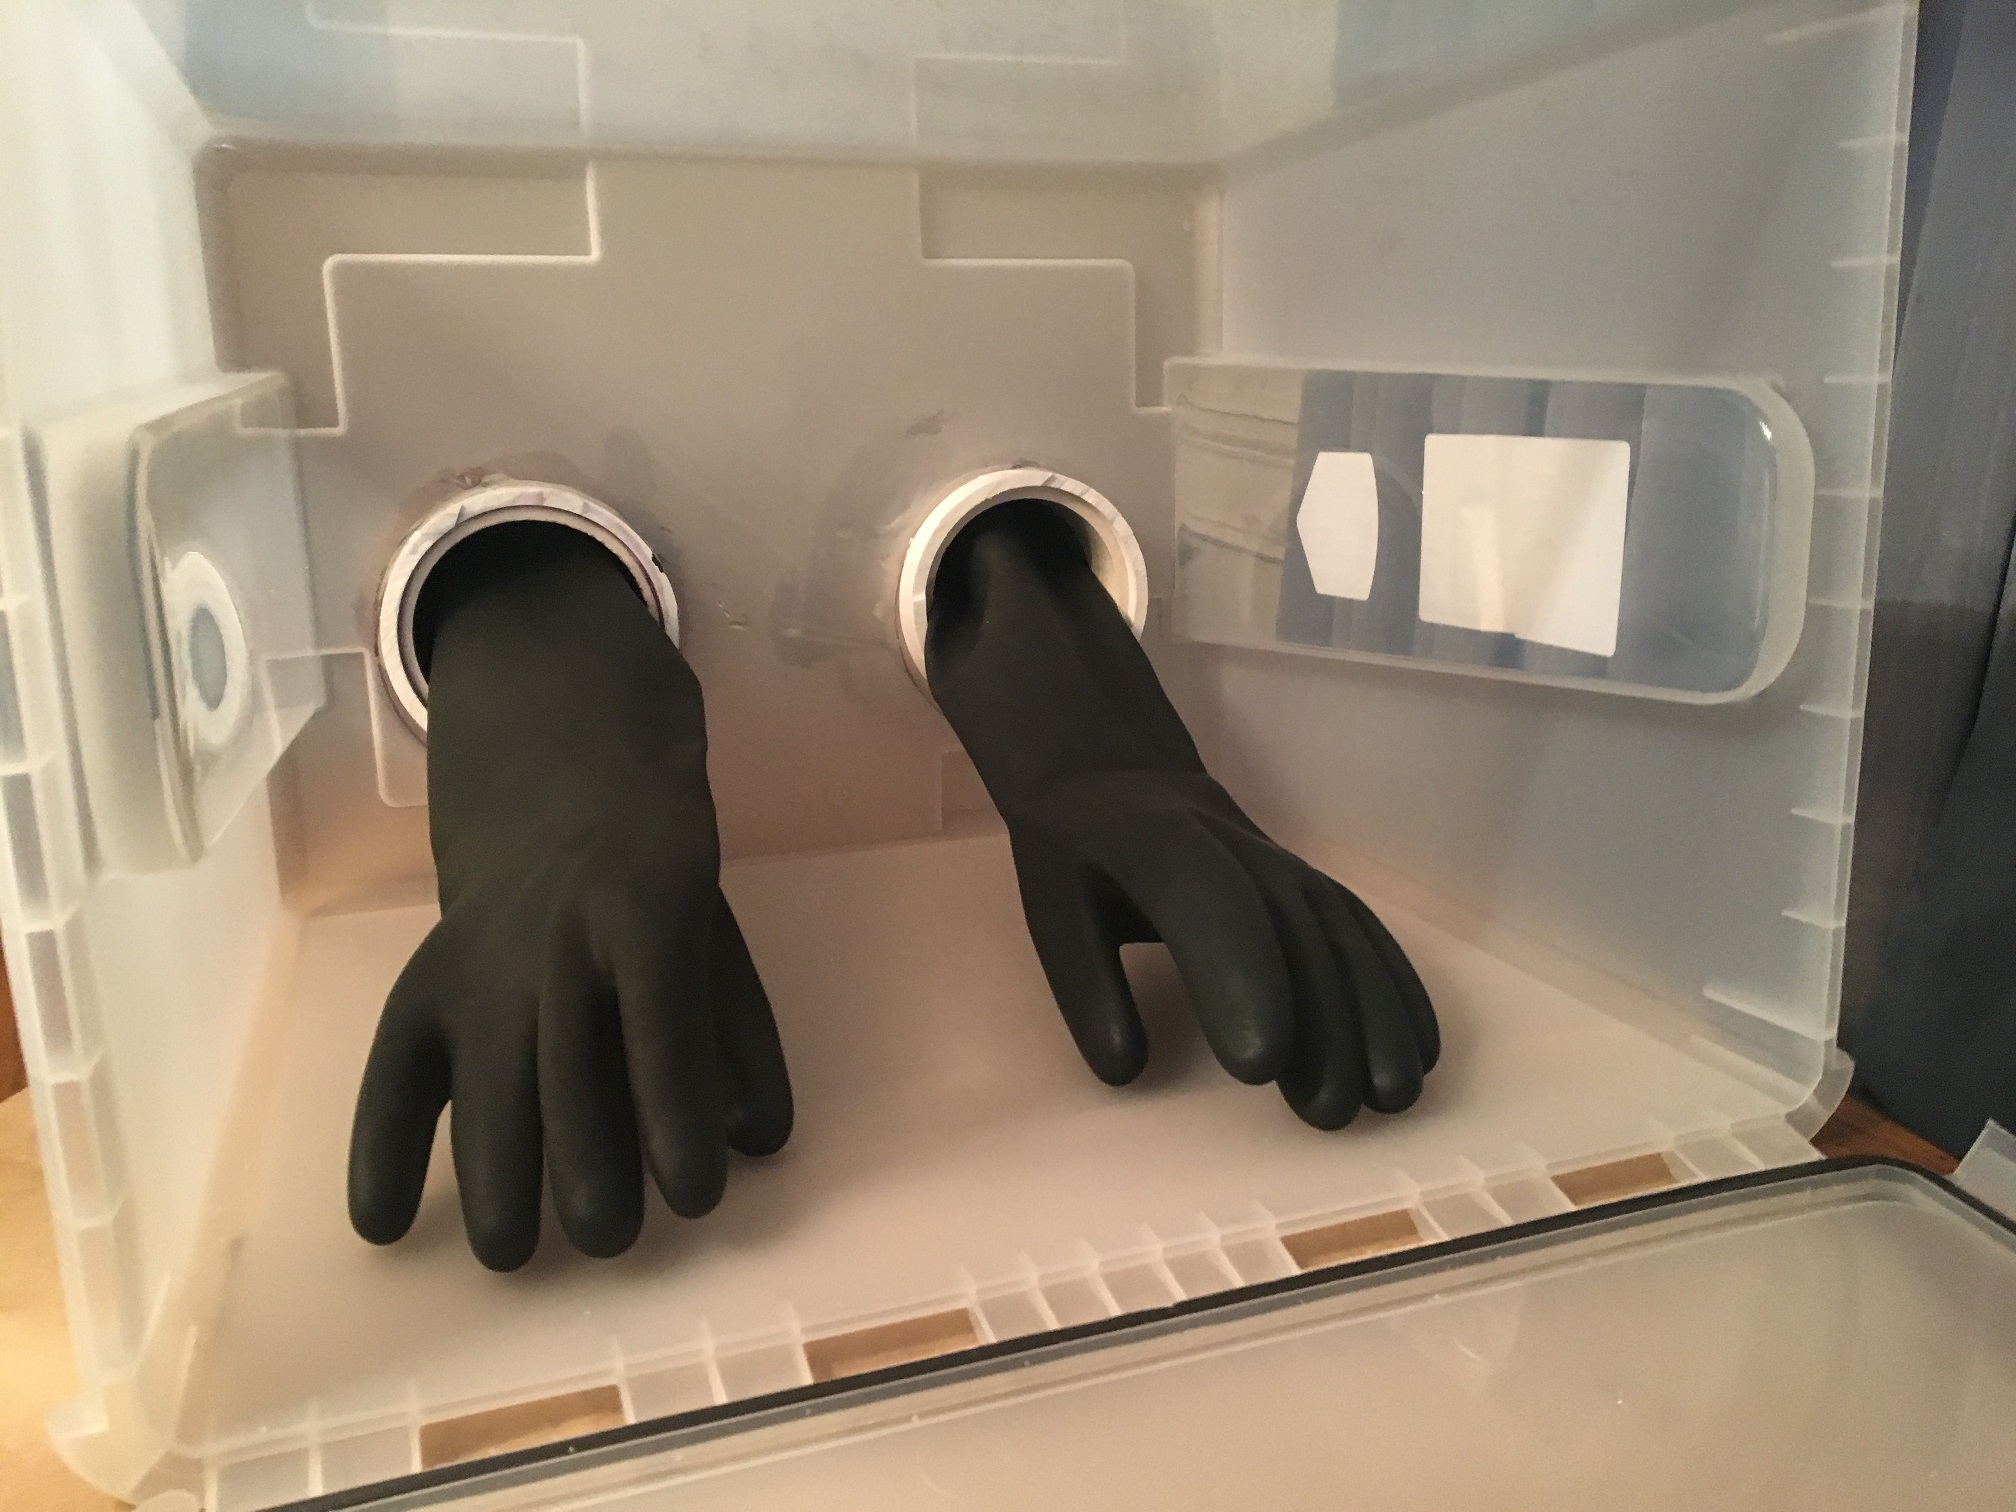
can insert the gloves. I
found this easier to do with the box facing lid down.
Be careful the gloves
are oriented properly, so the palms will be facing the 'bottom' of the box,
the backs of the hands are seen through the clear side of the box, and your
thumbs of each glove are close to the other glove. This is so much easier than
having your hands surgically altered to conform to your box.
-
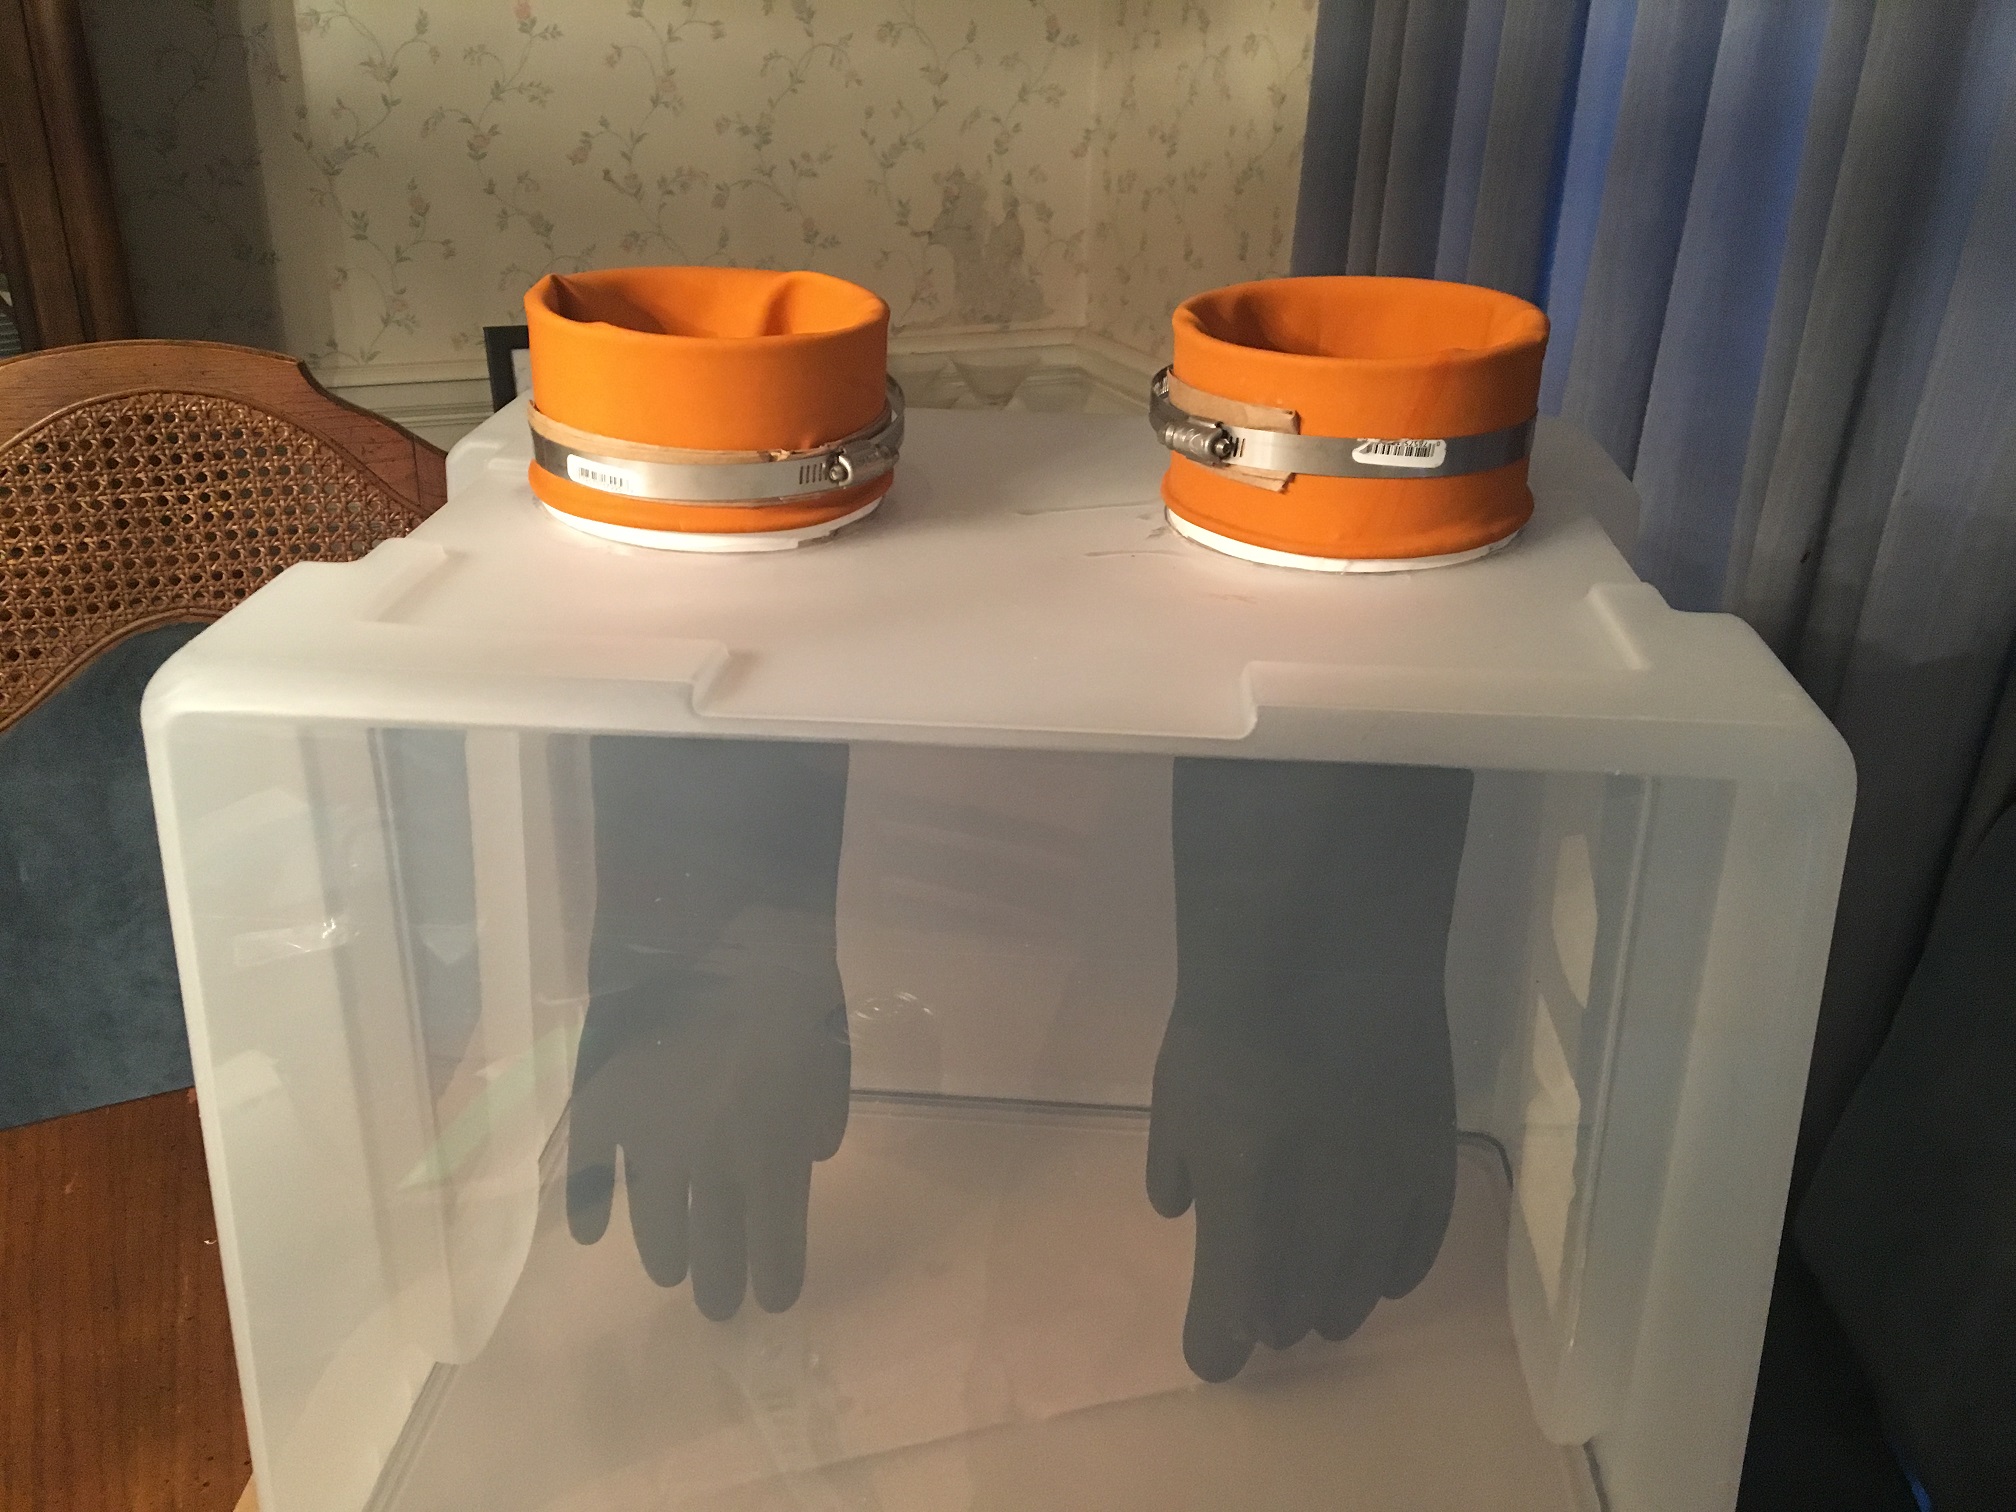
If you used the gloves and coupling in the parts list, the gloves openings
should invert and stretch over the outside of the PVC coupler. See picture.
-
Adjust the band clamps so they fit over ends of the gloves/couplings, as
shown in the picture. I used some folded paper between the clamp and the
gloves to protect the gloves from the steel of the clamps. Important to do so
under the screw gear. Tighten the clamps over the gloves, perhaps an inch
from the end of the opening.
-
Rolling the end of the glove over the tightened band clamp will protect you
from sharper portions of the band clamp.
Mistakes and Pitfalls
Mark/Measure Carefully: When I first marked the holes for the PVC pipe
to go through the back of the box, I used the pipe as a template, but
mistakenly marked it from the inside of the pipe, which was obviously too
small. This came in handy later, when the plastic broke and I needed to move
the hole up to cover the broken spot.
Cutting Holes: Cutting the plastic, of this type of box, is tricky.
The plastic is thin and brittle when moved perpendicular
to the plane of the surface. I used a burring bit with a dremel, which got it
to fairly thin, then used a box cutter to cut the rest of the the thickness
through. I used sawing motion which made the cutting easier. This
fractured the plastic after a few strokes. I had to move the hole up to
cover the broken spot.
I suspect something like a soldering iron can melt plastic to cut the holes,
rather than cutting with a cutting tool. If used, care must be taken to keep or make the surface flat. The
melted plastic will tend to create higher ridges interfering with the
positioning of the coupler/pipe flush against the plastic.
Positioning holes: I thought the holes were positioned well until I
tried to use the glovebox. The gloves are long, taking up my entire forearm,
meaning the elbows are at the exact level of the holes, barely allowing me
room to see over the edge of the box.
Choice of Box: Sterilite makes a box (80 qt, sealable) that isn't hinged, and has a
greater number of locking clamps. This should make for a better seal. Probably
less of an issue for mycology than for use with chemistry. I chose the
currently presented one because I couldn't find a Sterilite box, locally.
Chemistry Modifications: To modify this box for chemistry use would
require adding two gas ports. One inlet, one outlet. This would allow for
flushing the box with an inert gas, like Argon. Some chemistry operations
would be a problem in a non-inert atmosphere. This is a good youtube video for
making this type of glovebox.
|
